Saturday, 1 April 2017

Mouthwash - dentist approved

I briefly had a stint at making my own toothpaste, used different mixes for about 3 month's and then got randomly paranoid about yellow teeth. I didn't have yellow teeth. But I was spiralling out so I decided to stop making it and go back to my colgate total toothpaste.

I did however miss the exceptionally clean filling I got from using my bicarb based toothpaste. Especially my tongue, without getting too delicate, I want it looking healthy and pink, not like I just finished drinking milk.

I always felt normal mouthwash was overkill and unnecessarily expensive. So after a few versions, I finally got my diy moutwash perfect. It lasts for about a week, but it's so easy to make I could do it everyday. Takes less than 5 minutes.

Equipment

  • Sealable bottle roughly 200ml
  • Distilled / filtered water
  • Bicarbonate soda
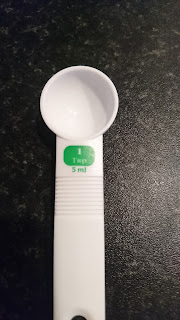
  • Measuring spoon
  • Cinnamon Essential oil
  • Clove Essential oil
  • Peppermint Essential oil
  • Spearmint Essential oil

Method

  1. Half fill the bottle with water
  2. Take a measured teaspoon and fill it with Bicarb to 4/5'ths (or the whole hog)
  3. Put 1 drop of Cinnamon, 2 drop of Clove, 2 drops of Peppermint, 2 drops of Spearmint Essential oil in
  4. Close the cap and shake until the Bicarb has dissolved.
  5. Shake before use


This is great for me. I learnt the hard way not to put too much Cinnamon in, that stuff is wicked strong. It's also great for sensitive teeth and any inside mouth issues because of the Clove oil primarily.

This is definitely a staple for me. At my last check up at the dentist I told her what I was using and she said that sounds fine because the Bicarb is an alkaline and Clove is so good for so many things like throat infections. She said a lot of people who start out making their own mouthwash use fruit juice for some reason and she has to tell them to stop immediately. Why would you start with juice I don't know.

Sunday, 26 March 2017

Spring Face cream - fresh as a baby

I am exceptionally proud of this baby.

I have combination skin, oily in the T zone and dry everywhere else. Also particularly prone to a very oily nose, meaning and constantly by wiping it like I had some kind of drug affliction.

I was really scared the first time I made face cream, I have sensitive skin as well so was almost positive I'd wake up in the morning with a face like a blow fish. But I never did, the most I uncovered in my experience was that my face doesn't like Olive oil, my body is absolutely fine with it but my face wasn't having it at all. Almost immediately I started to go red. I'm dark skinned woman, that is not an easy thing to do. It calmed down the moment I washed it off though.

The recipe below is my current Spring face cream, I change things up a little per season as my face has different requirements in reaction to the weather.

Your Kit (don't use the ones you use for food, pick some new cheap ones up from Poundland or whatever your equivalent shop is.)

This should take you 1 hour or less if you have all of your kit to hand.
  • 3 clean tubs 40ml or bigger
  • Kitchen scale
  • Small old / cheap saucepan
  • Pyrex measuring jug
  • Measuring water jug
  • Measuring spoons
  • 2 x Spatulas
  • Electric whisk (there is no joy in doing this by hand)
  • 5g Beeswax pellets (or equivalent)
  • 2g Mango butter
  • 4g Aloe Vera butter
  • 35g Sunflower oil
  • 1/8 tsp Neem oil
  • 1/2 tsp Vitamin E
  • 1/4 tsp Glycerin
  • 35ml Distilled water
  • 3 drops Lavender Essential Oil
  • 2 drops Frankincense Essential Oil
  • 1 drop Cedarwood Essential Oil
  • 5 drops Geranium Essential Oil
  • Paper towels
  • Baby wipes
  • Separate kitchen sponge

Directions

  1. Place your Pyrex jug on the scale and measure the Wax, use the measuring spoons to scoop out the Mango Butter and Aloe Butter but use the scale to measure them, pour in the Sunflower oil
  2. Put about in inch of water into you saucepan and turn it to about 4 (if your gauge goes up to 6), when you've done this a few times you can just put it on high
  3. Stir slowly it will help everything melt quicker
  4. In the meantime - measure out your distilled water with the water measuring jug, or alternatively, boil some water and put more than you need into the jug and let it cool (some will evaporate, you can measure out the mount of water you need later
  5. Stir the mixture until all the wax has melted, it will be the last to melt
  6. Take the jug out of the pan and leave on the side for a few minutes, then put the Neem in and stir. Neem oil can solidify so shake and warm the bottle in advance
  7. Cool down the jug by running some cold tap water on the outside of the jug.
  8. Put the Vitamin E in and stir
  9. Put the jug in the fridge for about 20 minutes or less, you want to take it out when the mixture looks close to warm Vaseline
  10. Mix the Glycerin into the water
  11. Get your whisk ready
  12. Take the jug out of the fridge, and start to whisk it on low
  13. With your other hand SLOWLY pour the water into the mixture whilst constantly whisking. This step alone can take a few minutes, if you rush it then your water can't be bound to the oil - I learned the hard way
  14. Once mixed, take your spatula and wipe around the jug making sure you pick up any water splashes, also use the spatula to sweep the bottom of the jug just in case the whisk didn't catch all of the oil mix. Use the OFF whisk to scrape off the spatula so that you keep as much mixture as possible in the jug
  15. Put your Essential oil drops in - you can change this to whatever works for your face, just keep the amounts roughly the same.
  16. Whisk again for another 2 minutes and you're done.
  17. Scoop your mixture into the 3 different pots, you'll use one pot per month. Separating them keeps germs down.
  18. My tubs are large at 100ml each so the amounts look tiny.
  19. You'll have excess cream inside the jug and on the spatula's, just rub it on your body rather than wasting it
  20. Wipe down everything with the paper towels, and then with the baby wipes
  21. Then wash the equipment as usual with your separate sponge
This should last you for just about 3 months, you can feel when you're getting to the end of your creams life cycle, it's subtle but you'll know when it's time to make a new batch. You will only need a pea sized amount morning and night. I'd highly recommend looking up all the ingredients on https://draxe.com/

Saturday, 25 March 2017

Thin to Thick - Hey JASON...

I have found that some conditioners that are supposed to provide protein are really just light touch detanglers. JASON Thin to Thick is not one of those.

I wanted to give myself a few days after doing a co-wash with it before writing. At first I felt like it just made my new growth soft and that was nice but nothing to write home about. As the days went on though, my usually fine hair just felt fat for want of a better word. It felt like I had about double the amount of hair on my head.

By the 4th day I realise that actually my hair now needs significantly more moisture than it usually does. That's on me rather than JASON, where I thought it may just be a light tough protein conditioner I used it when my hair only needed a top up of protein. This is much more like a reconstructor.

I am pleased with it, but I think the next time I use it I'll have to follow it up with a moisturising conditioner for balance, or alternatively add a couple of drops of Calendula essential oil when applying. Calendula is seriously moisturising - I only use it when I'm in real need like when I've had a bad cold for a week and haven't been able to wash my hair. Over moisturising can be as bad if not worse than over loading hair with protein.

I only got the Conditioner but they also do a Shampoo, a Scalp Elixir, and a Volume Spray. Using this really reminded me about timing with hair. I'm much better at listening to my hair now but maybe I was a bit too eager to use my new sparkling product. I'll do better.

This weekend I'll do another hot oil scalp massage before my deep condition. My hair is getting rally curly now so I really need to spend more time detangling gently, it's so easy at night to just want  to get through it, put on my head tie and get on with my meditation.