Showing posts with label essential oils. Show all posts

Saturday, 17 June 2017

Hair oil change

So I decided that Cocoa Butter in hair oil is not for me. I don't know if it's the fine hair or what but my hair was just consistently fluffy for about a month, see Fluffy hair post

So I decided to take the plunge and add Rosewood to my hair oil mix. It effects my hair in a protein/ACV way so strongly that I was a little scared that it would be too much to include it in the oil - even though I included just 1 drop.

That 1 drop saved me. I could put my flexi rods in and have shiny defined curls even with my tiny tightly curled routes fighting for attention.

My relaxer is on Thursday (9 week stretch) I've been living in one lobster clasp at the back with curls exploding from the top and the front. It's working for me even if it is a little 90's. I'm turning 30 in a very short period of time so it's safe to say it will be difficult to age me from all sides anyway- heeeeyyyyy.

Hair oil mix below - if you try it let me know how it goes. I think the Avocado is helping me as well because I can put this mix straight in my damp hair and it just helps so much with the detangling.

  • 15g Mango Butter
  • 45g Coconut Oil
  • 12ml Olive Oil
  • 7ml Jojoba
  • 5ml Vitamin E
  • 1ml Avocado oil
  • Essiantial oils -
  • 1 x Rosewood
  • 3 x Rosemary
  • 2 x Calendula
  • 3 x Lavender
  • 1 x Frankincense


Wednesday, 3 May 2017

Mrs K's Eczema cream

I was so happy when my friend said that her mum wanted me to make more of this for her.

I do do my research but I am not trained in any certified sense so to know that this worked for her felt amazing. She had bad eczema on her ears for as long as she could remember, it was so dry her ears were constantly cracking and bleeding. She never were her hair down and had tried every prescribed cream and ointment she could get. She lives in New York so I imagine they have much more available for cosmetic help than we do. Her eczema is also much worse than anything I have, so making something cosmetically medicinal for someone else was a challenge.

This she said was the only thing that worked. She's now left with pink ears, no cracking no bleeding. Applied at night mostly as it's oily, this little pot lasted her 4 months. She'll be coming to the UK soon so I will be making her some more fresh from the pot then ❤

50 ml tub
  • 2g Beeswax
  • 11g Aloe Butter
  • 12g Coconut oil (virgin obvs)
  • 5g Vitamin E oil
  • 13g Jojoba oil
  • 2 drop Lavender Essential Oil
  • 1 drop Cedarwood EO
  • 1 drop Rose EO

Unfortunately she didn't take a before and after picture, my friend just gets to see live progress over Skype and reports back to me. She has asked if it's possible to make it slightly less oily next time, but doesn't want me to sacrifice any of the good stuff that makes it work. I would like to put in some Cyclomethicone but she's so sensitive I'm not even sure if that will work out. Maybe I'll just swap the Jojoba out for Avocado oil as it's drier. I'll figure it out I'm sure.

PS. If you have any questions about this stuff or just want to pick my brain, just write in the comments, I'll reply.

Charley x

Saturday, 29 April 2017

DIY Hair oil

Probably the concoction I'm most proud of making. It kind of developed over time.
I started using Coconut oil as my sealer after reading all of the hype about it. Understandable hype as it turns out.

I, being the impatient person I was / am didn't wait the whole 10 seconds for the oil to melt in my hands before applying it to my hair, which meant I nearly always put too much or too little in, or rubbed the oil into my hair forcefully like a grizzly bear scratching it's back against a tree.

So I made a mixture with jojoba oil, then with jojoba and vitamin e, then with avocado, the list goes on. Eventually, when I started experimenting with body cream, I got my hands on some mango butter which is weirdly dry. When I mixed that into the sealer I knew I got it right. One of my biggest aims was that my hair still feel touchable, I have never been a fan of the greasy head feeling, especially as I have fine hair so too much just weighs me down. The mango butter took the worry out of it.

As time went by I found the right balance, I still experiment with the liquid oils and essential oil amounts and choices. But the core elements of Mango Butter, Coconut oil and Vitamin E have stayed the same.

Ingredients
  • 15g Mango Butter
  • 45g Coconut oil
  • 5g Vitamin E
  • 12g Olive oil
  • 7g Jojoba oil
  • 1g Cocoa butter - first time using this in the sealer, was Lanolin
  • 3 x Rosemary EO
  • 2 x Calendula
  • 3 x Lavender
  • 2 x Vetiver
  • Whisk, tissue, baby wipes, pyrex
Put everything except the jojoba and essential oils in the pyrex and double boiler, heat and stir until the mango butter is completely melted. Wait for it to cool until it is murky like Vaseline.
Whisk and use the spatula to get any oil from the bottom. Add the essential oils until you get a nice smooth mix. It lasts me about 6 weeks or so.


Wednesday, 26 April 2017

Natural (mostly) body lotion

La body lotion. I have had words with and against this process. I started off with a strange aloe vera oil mix which was weirdly moisturising, but it was in the days when I had no idea about preservatives and emulsifiers.

Recently I got annoyed when I saw my lotion was running low (first world problems). I then thought well I'll just go online and buy myself an emergency bottle for these such times. I was somewhat dismayed when I realised just how expensive natural lotion was - around £20 for roughly 200ml.

I make about 400ml worth and it lasts me for 2 months and costs around £2.50 exc time, so even if I price myself at £20 per hour I'm still in the green not to mention the obvious perks of being able to adjust the recipe accordingly. Thinking about it now I probably should have added some cocoa butter to thicken it a bit but it the texture isn't my primary goal at the moment.

This particular recipe is actually designed for a pump bottle but I didn't finish my hand wash in time - a like to reuse the bottle - go recycling! So I've put them in tubs, it's lotion rather than cream, but I'm hoping I adjusted the recipe enough so that the lotion still stays on the skin happily for a good 15 hours or so.

I try to think of it like baking, sorting out your dry mix and wet mix separately, so in this case, sort your water mix (water, rose water, glycerin) and then your oil butter wax mix.

Ingredients (interchangeable with mls)
  • 15g Beeswax - Binds the oil to the water
  • 40g Coconut oil - moisturising
  • 11g Lanolin - sealing
  • 18g Mango Butter - anti greasy feeling
  • 27g Aloe Butter - moisturising and anti greasy feeling
  • 90g Sunflower oil - moisturising
Put these ingredients into the pyrex and double boiler (pan on stove with water). Melt and stir until you can't see any wax. While this is melting, boil and measure your water, don't add the rose water and glycerin to the water mixture until the oil is ready for it to be blended in.

Cool down the oil until it starts to look murky, then add these ingredients
  • 20g Cyclomethicone - sheen and anti greasy feeling
  • 3/4 tsp Neem oil - antibacterial/preservative
  • 5ml Vitamin E - antioxidant / stops oils from smelling funny
Give it a quick whisk. Use the spatula to grab any leftover oils at the bottom

  • 120ml filtered and boiled water - moisturising
  • 20ml Rose water - moisturising
  • 5ml Glycerin - humectant, moisturising
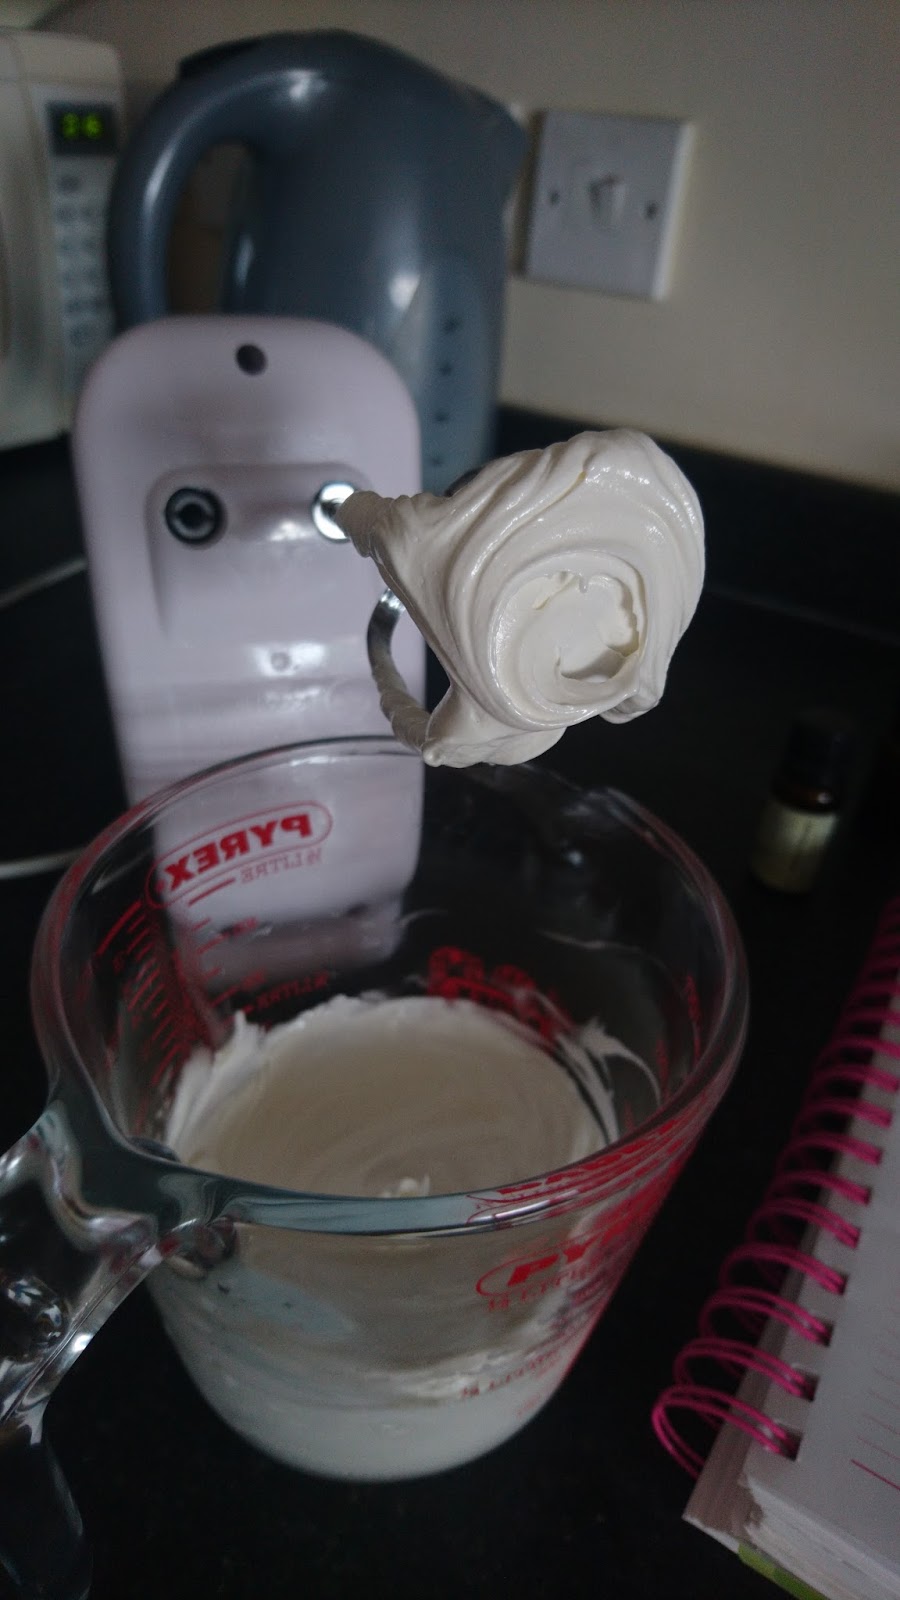
Add the rose water and glycerin to your water mix. SLOWLY add mixed water to the mixed oil whilst whisking on low. Should take minimum 10 minutes or you're going to fast. Every now and then stop the whisk and run the spatula along the sides and the bottom. When you have about 20 ml of water left, add the essential oils. Whisk until the water is fully incorporated and then whisk for a further 1 or 2 minutes.
  • 7 drops Geranium essential oil - preservative and nice to skin
  • 4 drop Patchouli - this and all others have great properties but were added for fragrance
  • 4 drop Jasmine
  • 1 x Tea tree
  • 3 x Rosewood
  • 3 x Bergamot
  • 2 x Calendula - moisturising
  • Electric whisk
  • Mixing utensils, tissue and baby wipes
Clean up with tissues and then baby wipes and then wash as normal, put the tubs you're not using right now in the fridge and write the date on top. Use within 3 months. Put any extra fresh on your skin though waste not want not.😁

Sunday, 16 April 2017

Leave in conditioner - Peppermint oil, I love you long time

Sometimes I forget how much things used to cost me before I started making them.

The other day I got lazy-annoyed about having to make more body lotion, so I thought I'll just buy a natural lotion. To which I then looked online and saw the prices and then my memory came back - but that's another conversation, I'll be making more lotion in a few weeks time so I'll talk about that then.

The same does apply for my leave in conditioner though, I have fine hair, I have never been a fan of the thick leave ins that you're supposed to put in your hair every day, they just made my hair look limp.

Through a lot of experimentation - and I'm sure it says something about it in the Science of Black Hair book. I then came across this lovely beauty which I have been using in good and bad ways for years but I believe I have now got it right.

My leave in conditioner uses these
  • Water
  • Rosemary, Lavender, Peppermint Essential oil
  • Glycerin
  • JASON Aloe Vera conditioner
  • Spray bottle with adjustable nozzle
I typically use about a tsp of JASON, 250ml water, small dollop of Glycerin, 3 Rosemary, 2 Lavender, 3 Peppermint. I make a new one every 2 weeks and sometimes add an extra drop or 2 of EO after the first week. I can use this every day/ night followed by some protein when needed and sealer. The trick is to learning the amount you need to use. Some people like to co-wash every night, I don't have time for that - enough water, is enough.

In my *not paying attention* days I used to assume that the preservatives in the conditioner would keep the water from going bad for weeks - months - my full 9 week term. This was disgusting, I know that now, it was the reason why I had an itchy scalp, actively putting bacteria on my head and wondering why... Now 2 weeks is just enough, and I can always switch it up at anytime without it really costing me anything, the most expensive thing in it is the Conditioner and I can live with that, I'm a geek (and proud) I worked out that this costs me roughly 43p a month.

Once I corrected the above, I experimented again with different EO's, to be honest Sandalwood and my hair/scalp don't mix, I have no idea why because it's supposed to be moisturising but, it makes my hair feel dry. And even though every mix I did included Rosemary, my scalp really missed the Peppermint. I stopped using the peppermint because everyone everywhere says you should use that for greasy hair, and mine isn't greasy. But you know what, I think it helps to balance out the oils in my hair. Especially as my sealer is a mixture of oils and butters, that's the last ingredient that means I or anyone else can touch my hair and not need to wash their hands afterward (that and Mango butter). That's very important to me.

I do need to get a spray bottle that I can see through though, I don't know why I thought it was clever to get a pretty metal one. smh

Happy Easter Sunday :)

Sunday, 26 March 2017

Spring Face cream - fresh as a baby

I am exceptionally proud of this baby.

I have combination skin, oily in the T zone and dry everywhere else. Also particularly prone to a very oily nose, meaning and constantly by wiping it like I had some kind of drug affliction.

I was really scared the first time I made face cream, I have sensitive skin as well so was almost positive I'd wake up in the morning with a face like a blow fish. But I never did, the most I uncovered in my experience was that my face doesn't like Olive oil, my body is absolutely fine with it but my face wasn't having it at all. Almost immediately I started to go red. I'm dark skinned woman, that is not an easy thing to do. It calmed down the moment I washed it off though.

The recipe below is my current Spring face cream, I change things up a little per season as my face has different requirements in reaction to the weather.

Your Kit (don't use the ones you use for food, pick some new cheap ones up from Poundland or whatever your equivalent shop is.)

This should take you 1 hour or less if you have all of your kit to hand.
  • 3 clean tubs 40ml or bigger
  • Kitchen scale
  • Small old / cheap saucepan
  • Pyrex measuring jug
  • Measuring water jug
  • Measuring spoons
  • 2 x Spatulas
  • Electric whisk (there is no joy in doing this by hand)
  • 5g Beeswax pellets (or equivalent)
  • 2g Mango butter
  • 4g Aloe Vera butter
  • 35g Sunflower oil
  • 1/8 tsp Neem oil
  • 1/2 tsp Vitamin E
  • 1/4 tsp Glycerin
  • 35ml Distilled water
  • 3 drops Lavender Essential Oil
  • 2 drops Frankincense Essential Oil
  • 1 drop Cedarwood Essential Oil
  • 5 drops Geranium Essential Oil
  • Paper towels
  • Baby wipes
  • Separate kitchen sponge

Directions

  1. Place your Pyrex jug on the scale and measure the Wax, use the measuring spoons to scoop out the Mango Butter and Aloe Butter but use the scale to measure them, pour in the Sunflower oil
  2. Put about in inch of water into you saucepan and turn it to about 4 (if your gauge goes up to 6), when you've done this a few times you can just put it on high
  3. Stir slowly it will help everything melt quicker
  4. In the meantime - measure out your distilled water with the water measuring jug, or alternatively, boil some water and put more than you need into the jug and let it cool (some will evaporate, you can measure out the mount of water you need later
  5. Stir the mixture until all the wax has melted, it will be the last to melt
  6. Take the jug out of the pan and leave on the side for a few minutes, then put the Neem in and stir. Neem oil can solidify so shake and warm the bottle in advance
  7. Cool down the jug by running some cold tap water on the outside of the jug.
  8. Put the Vitamin E in and stir
  9. Put the jug in the fridge for about 20 minutes or less, you want to take it out when the mixture looks close to warm Vaseline
  10. Mix the Glycerin into the water
  11. Get your whisk ready
  12. Take the jug out of the fridge, and start to whisk it on low
  13. With your other hand SLOWLY pour the water into the mixture whilst constantly whisking. This step alone can take a few minutes, if you rush it then your water can't be bound to the oil - I learned the hard way
  14. Once mixed, take your spatula and wipe around the jug making sure you pick up any water splashes, also use the spatula to sweep the bottom of the jug just in case the whisk didn't catch all of the oil mix. Use the OFF whisk to scrape off the spatula so that you keep as much mixture as possible in the jug
  15. Put your Essential oil drops in - you can change this to whatever works for your face, just keep the amounts roughly the same.
  16. Whisk again for another 2 minutes and you're done.
  17. Scoop your mixture into the 3 different pots, you'll use one pot per month. Separating them keeps germs down.
  18. My tubs are large at 100ml each so the amounts look tiny.
  19. You'll have excess cream inside the jug and on the spatula's, just rub it on your body rather than wasting it
  20. Wipe down everything with the paper towels, and then with the baby wipes
  21. Then wash the equipment as usual with your separate sponge
This should last you for just about 3 months, you can feel when you're getting to the end of your creams life cycle, it's subtle but you'll know when it's time to make a new batch. You will only need a pea sized amount morning and night. I'd highly recommend looking up all the ingredients on https://draxe.com/

Sunday, 19 March 2017

Rosewood oil - my secret weapon?

Rosewood Essential Oil!

I don't know why this works but it does. As I've been making my cosmetics over the past 2 years or so, I've steadily been stocking up on my essential oils. I think I may have about 20 or so at the moment, I'll write about them all at some point I'm sure.

As I'm naturally curious, I've been adding a drop or 2 to my shampoo or conditioner (after doing my research) to see what it would add to my hair. Some of my favourites for wash day are:
  1. Rosewood (obviously)
  2. Rosemary - used most frequently
  3. Lavender - go to fix all if I don't know what I need
  4. Cedarwood - for those itchy / painful scalp days
  5. Calendula - by far the easiest way to make your hair drink water fast
Now my Lady Rosewood is a tricky tricky EO. Mostly because I can't find anywhere on the internet that says it does what it does to my hair. I did however find a few mentions of it being endangered and to use Ho Wood oil as a replacement, but all of those articles are from several years ago, and when I bought it, it wasn't that expensive, so I'm hoping I haven't hurt a tree somewhere.

The best I can find is that it's an Astringent so if I work that out in my head, that means it will flatten the cuticles. So I can say, I use Rosewood oil to straighten and strengthen my hair. At 3 weeks post relaxer that was only 75% done in the first place and an awful lot of massaging rosemary oil into my scalp, I had a lot more curl than I was used to, so I thought it's time to put some Rosewood in because I remembered the first and only time I used it, I got a lot of shine and it just felt strong. So here I went again.

It was my co wash day so I put 2 drops in my hand with my JASON Aloe Vera and worked it through, by the time I finished I thought I could feel the hair was straighter but it was just me. I put a grip in it and showered, then rinsed it out with luke warm water. It was probably only sitting in for about 2 minutes. Let me tell you, my hair as I was finger combing it, maybe 2 were left on my hands. Audrey Davis-Sivasothy says that healthy hair will only have about 20 broken strands a day (I think it's a day). These days I'm about 10 in the morning and 15-20 at night which I can tell you is so much better than I was back in the day, when I was brushing my hair and cleaning countless strands out of it.

The ends were so straight and strong that they barely held a curl that first night, which I know sounds counterintuitive but the initial electric shock style hair wears off. As the days went by it was much easier to style, the texlaxed curls and new growth were now just waves. This stayed this way through to Sunday when I washed and deep conditioned it. And I forgot to take a picture before I did - sorry - but I will do next time.

So even now as I'm air drying my hair, the roots are only slightly puffier than they ought to be at this point. I don't even want to put Lady Rosewood into my hair oil or leave in conditioner for fear that my hair gets to used to it.

I did a lovely new scalp massage today which I will write up later, and just added 2 drops of Cedarwood to my conditioner. If anyone ANYONE else has used Rosewood, please let me know how it worked out for you.

Until next time.

Saturday, 18 March 2017

Face Wash - Well saved money

I love my face wash and my face wash loves me!

I think I started making face wash a little over a year ago now, and have changed the recipe several times. For a good little while it used to be coconut oil based - sounds strange but it worked just fine. The only reason why I changed it up to a spray was because I didn't like dipping my finger in the pot. I suppose I could have gotten a squeezey tube, which I may well try out in the future but for now. This spray is my baby.

So the tools are as follows

  1. 50ml Spray bottle
  2. Castile Soap
  3. Distilled / filtered water
  4. Essential oils - Lavender, Tea Tree, Geranium, Cedar wood.
  5. Glycerin
  6. Scale
  7. A small funnel


Right, now this is pretty straight forward as things go.
  1. Make sure your spray bottle is clean.
  2. Place the funnel in the bottle and put it on the scale
  3. Pour 15ml of the Castile soap SLOWLY
  4. Add just a drop of Glycerin
  5. Add 2 drops of Lavender
  6. 2 drops of Tea Tree
  7. 1 drop of Cedarwood
  8. 1 drop of Geranium
  9. Then pour 35 ml of distilled water into the bottle
  10. Put the spray cap on
  11. Shake it like a polaroid picture
  12. Spray it a few times into the sink
  13. You're good to go

This lasts me for about 3 weeks in the Winter and 2 weeks in the Summer. I never finish the bottle but you get a feel for when all of the anti bad things the essential oil is for is used up. The whole process can be done in less than 5 minutes if you have a steady hand so I don't mind making it frequently. And my rough calculations add up to about 50p per bottle. But it will be much cheaper when I buy my new giant bottle of Castile soap - it will then work out to be roughly 20p per bottle.
Quick calculation of 20p every two weeks is £5.20. Even if I made a new wash every week it would work out to be £10.40.

So yes I save my money, and I can ramp up or down what I'm washing my face with, for example if I have some enlarged pore action going on, I can add more Cedarwood, if my skin is feeling a little dry in the Winter, I can add more Geranium.

I've listed below why I've added the ingredients I have. The essential oils do have several other uses.

  1. Castile Soap - It's a soap... it clears all the dirt / pollution away
  2. Distilled / filtered water - not tap water, there's just less chance of it carrying germs into your mix
  3. Lavender EO - For it's antimicrobial and antioxidant loveliness, it's good for eczema sufferers as well. Won't dry the skin out and is anti inflammatory.
  4. Tea Tree - It kills germs dead! As far as I can tell anyway, I even add this to my laundry. Great for spots including acne
  5. Cedarwood - one of my favourites, it balances sebum production and closes the pores, so my oily parts aren't so oily and my dry parts aren't so dry. It's an anti inflammatory as well
  6. Geranium - a staple in the collection. Toner, wrinkle reducer, bug repellent, and helps to fade scars from those old but not entirely forgotten spots. I don't wear foundation so the need for a balanced skin tone is a must
  7. Glycerine - It's a humectant, so it draws moisture to the skin. I have combination skin and still use this.
If you want to try making this yourself, please test on a small area first and read all about Essential Oils and Castile soap so you can make your own decisions as to whether you're comfortable with them.

The websites I'm on frequently are